Steg 1
Download PrivatVPN certificate from: CA.zip
Open CA.zip
Steg 2
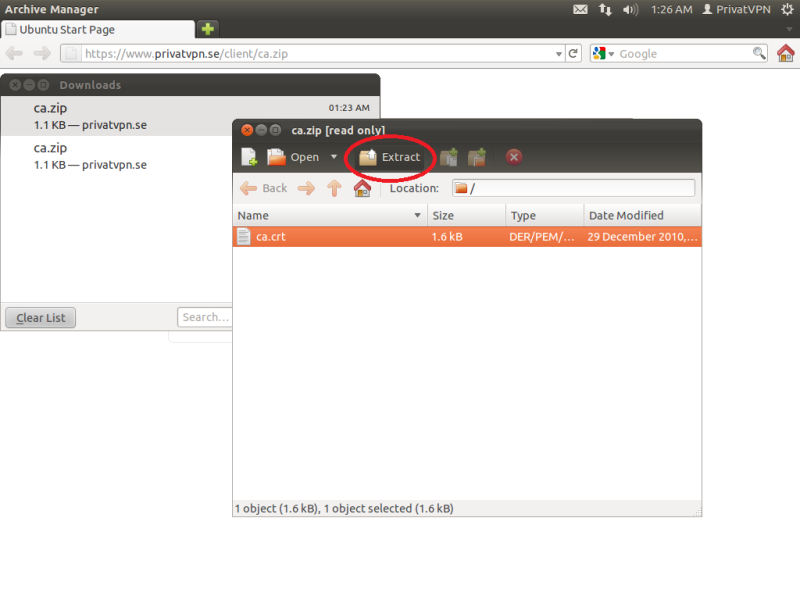
Select ca.crt and click on Extract.
Steg 3
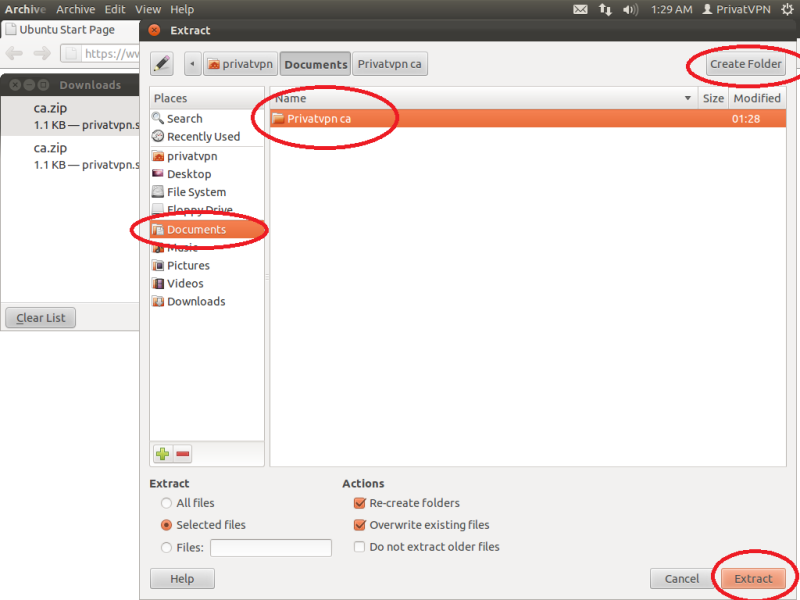
Navigate to Documents and click on Create Folder. When you’ve have created the folder, enter the folder and extract the certificate in to the folder by clicking on Extract button.
Steg 4
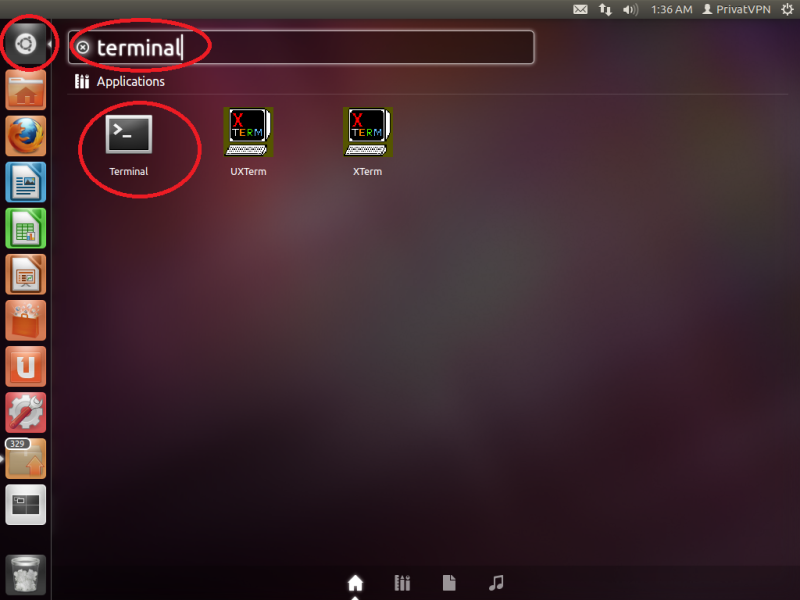
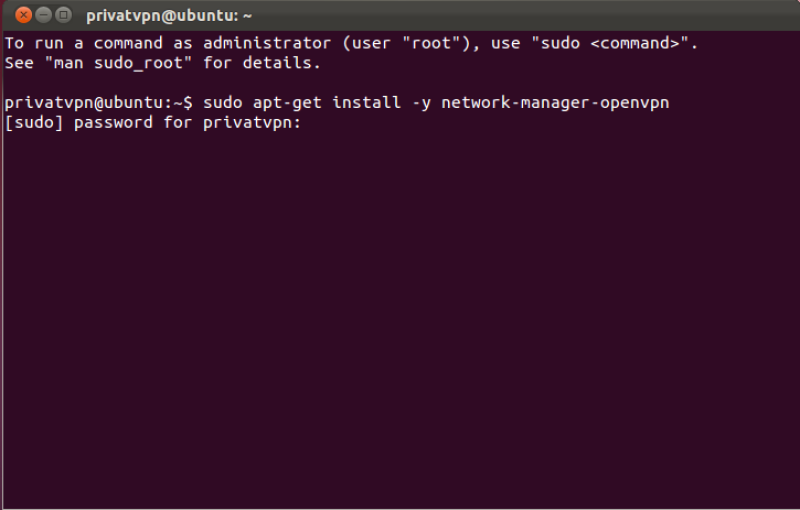
Now it’s time to install Network Manager. Start the Terminal. One easy way to start the Terminal is to click on the search icon and write terminal in the field and press enter.
Steg 5
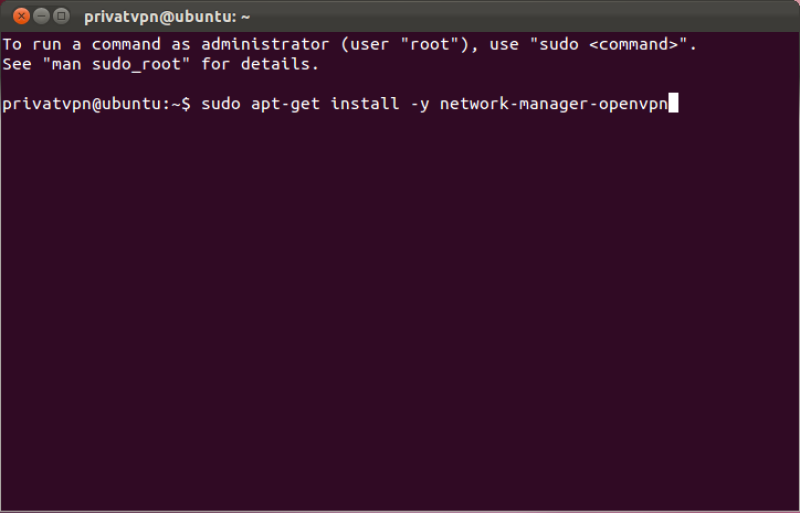
In the Terminal, enter this line: sudo apt-get install -y network-manager-openvpn and press enter.
If you’re using Ubuntu 16.04. Run this Command: sudo apt-get install network-manager-openvpn-gnome
Steg 6
Enter your password for the Ubuntu account.
Steg 7
When the installation process is completed. Click on the Network icon – VPN Connections – Configure VPN…

Steg 8
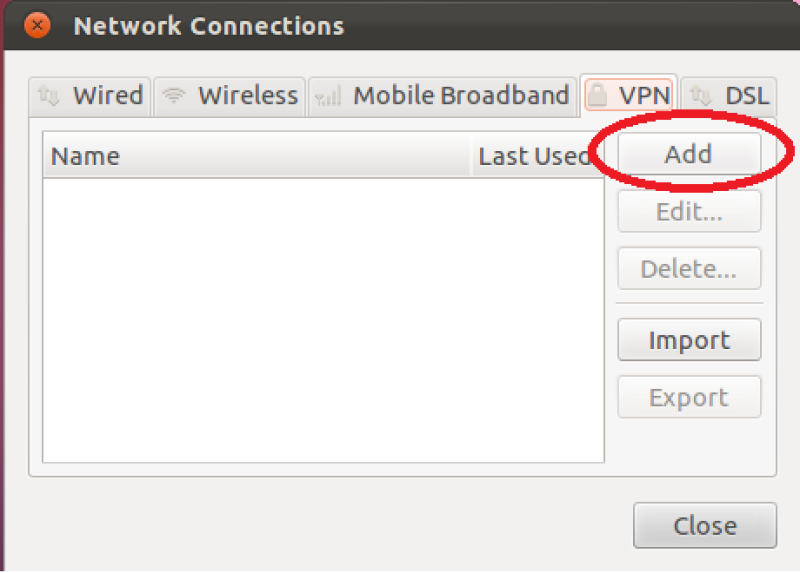
Click on Add.
Steg 9
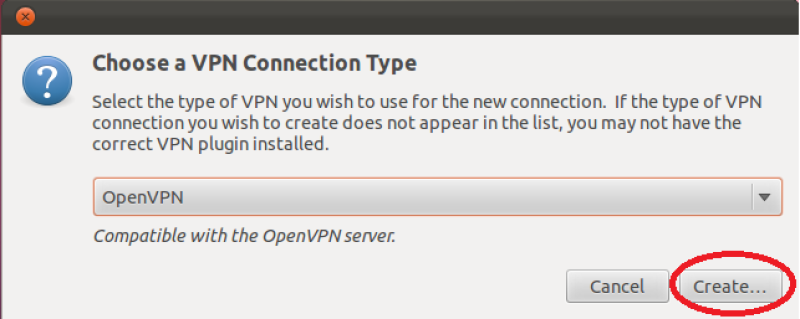
Select OpenVPN and click on Create…
Steg 10
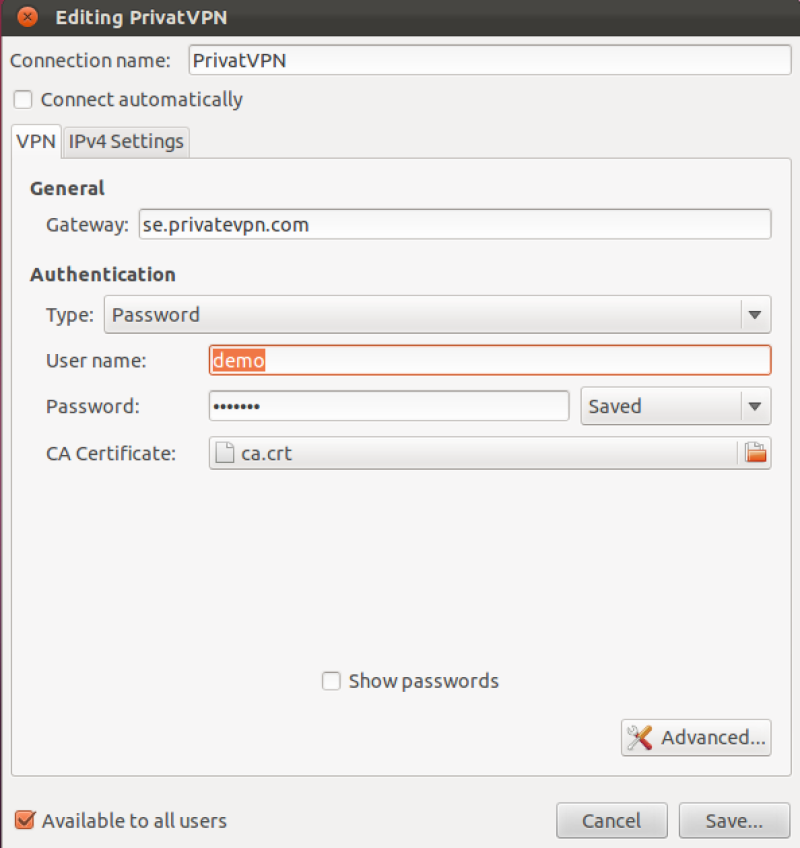
Enter the following information. Select Connect automatically if you would the VPN to connect every time Ubuntu starts.
Connection name: PrivateVPN
Gateway: Depends on which country you want to connect to. For example Sweden, vpn-se1.privatevpn.com. See the server list below!
Type: Password
User name: Enter your user name for PrivateVPN
Password: Enter your password for PrivateVPN
CA Certificate: Click on the little folder icon. Browse to the folder you’ve extracted the certificate to, in this case Documents/Privatvpn ca. Select ca.crt and click on Open.
You’ll find the server list here: Server list
Steg 11
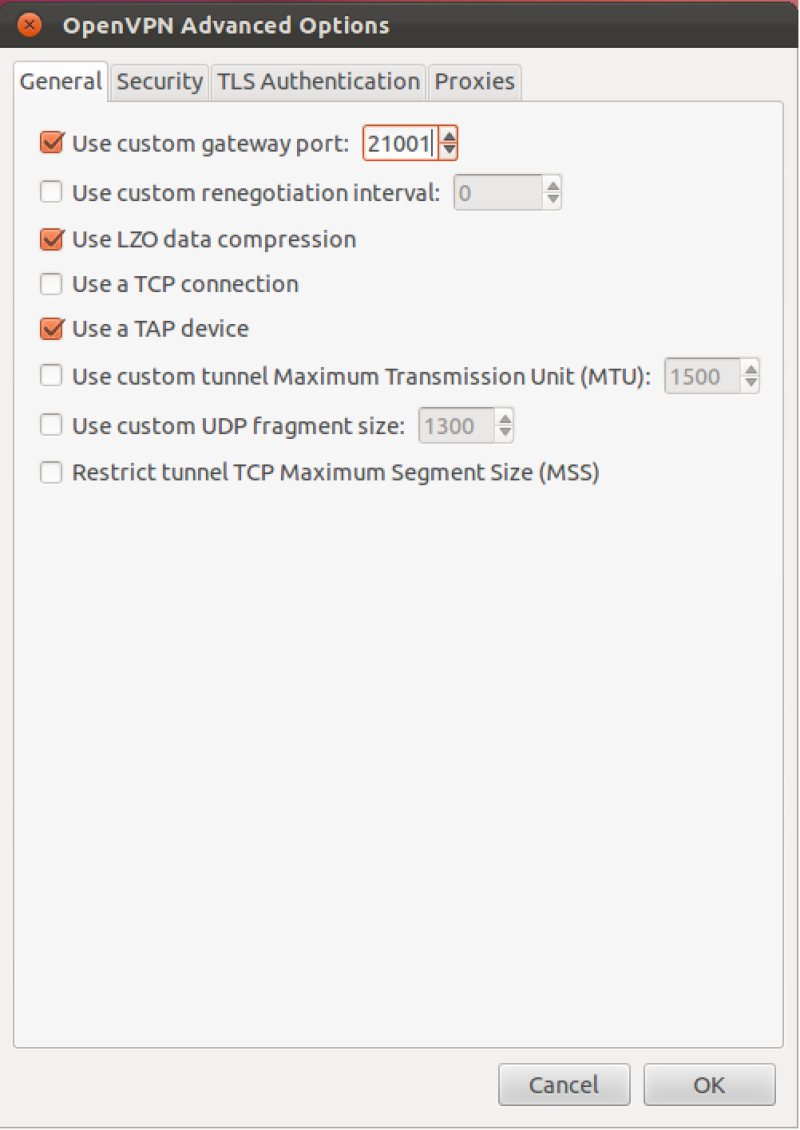
Click on the Advanced… button. Select following options:
Use custom gateway port: Enter the port number from the “Server list”. On the Swedish server we have several ports.
Use LZO data compression
Use a TAP device
Now click on OK and then Save…
Steg 12
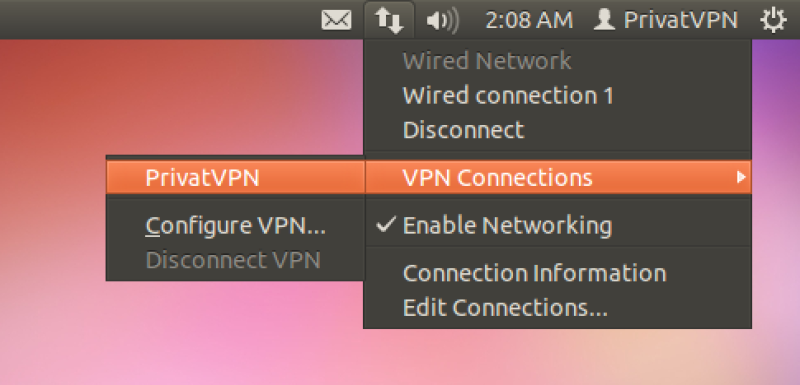
Click on the Network icon – VPN Connections – PrivateVPN
Steg 13
Enter your password for PrivateVPN and click on OK.
